


In order to grab the attention of users and increase acquisition rate, the role of quick loading pages is getting highly popularized. If any website loads slowly, there are chances of decreased revenue and increased page abandonment. With so many surveys being conducted, it has been found that users expect websites to load quickly. This is even truer for mobile where internet connectivity can slow down things. To fight with slow data connections, a great way that can be used to speed up the website on mobile is to set up Google AMP for WordPress. This is also known as accelerated mobile pages.
What Actually Is Google AMP: An Overview
This functionality was announced by Google for the creation of quick loading mobile web pages. This framework has been developed to allow site admin to improve speed for their mobile usability. This feature is great for content that is multilateral. Developers can easily create stripped-down versions of posts that can easily be served to mobile readers.
Google’s AMP or Accelerated Mobile Pages functionality is becoming the standard for the development of a fast-loading page. AMP’s are able to operate 15-70 percent faster than standard mobile pages without compromising the functionality.
AMP for WordPress is the right choice because it is simple to implement, has large number of installations, positive reviews and so on. It is recommended to take proper steps to set up AMP successfully.
Let us see how quickly you can set up Google AMP for your WordPress website
Creating A Clone Of Your Website
Clone or backup is something every website needs. You should do it on a regular basis Similarly, while installing a new plugin or theme, it is important to create a backup. Creating a backup is also important if you wish to clone your website on server to a development website. This step is completely optional but is an ultimate way to upgrade your website to AMP instantly and also eliminate any kind of error that comes in the way.
To take a backup of your website, take the real copy and upload it to server that is not public. The next process is inserting the AMP plugin, activating it and then fixing all the issues to ensure its smooth working. Once you are sure about getting everything exactly as you want, take a copy of the development site and upload it over the live website. Further, you need to overwrite the live version with the latest version you developed.
Activation and Installation of AMP for WordPress
On activating the AMP plugin for WordPress, you need to go to the settings page and explore all the various settings. You can go to the settings which is available on the left of WordPress dashboard. You just need to scroll down to “AMP”.
The major two areas that need to be focused are “Settings” and “Appearance” tab.
On exploring the “settings” section, you will see a lot of options. Let us explore some important ones in detail:
- General: In this setting, developers can upload a custom logo for AMP and create a custom AMP for the home page. By doing so, you will be able to deliver a quick mobile experience. Further, you will have the option to direct all mobile traffic to AMP. Also, there is an option to turn on AMP for all pages.
- Page Builder: Turn this option “ON” to create unlimited landing pages.
- Advertisement: This option lets the developers set up your ads on AMP.
- SEO: This setting is important for visibility on searches. Here you can find advanced settings for index or noindexing certain pages for AMP.
- Analytics: This setting allows the developers to set up Google Analytics and Tag Manager for AMP.
- Structured Data: Upload unique image placeholder for post images here.
- Notifications: This setting allows to notify users that you collect cookies. This notification can be enabled on AMP.
- Advanced settings: Under this tab, you can push all the mobile traffic to AMP for an enhanced user experience.
Next is the “Appearance” section that has some important settings. In “Appearance” you can find:
- Themes: There are 3 themes to choose from. If you are an advanced user, you can create your own theme. The overall appearance of AMP will improve.
- Header: Here, you can insert menus to your website’s AMP.
- Single: This offers multiple options for AMP like sticky social icons, previous next navigation and so on.
- Social: Social sharing in AMP can be easily set up using this setting.
It is suggested to go through these settings in detail. Once you have set up everything the way you want, the next step is validation of accelerated mobile pages.
How To Validate AMP For WordPress
Once you have set up the AMP for WordPress, make sure AMP runs optimally as per the Google’s guidelines. Here are some ways you can do that:
AMP validator by AMP project
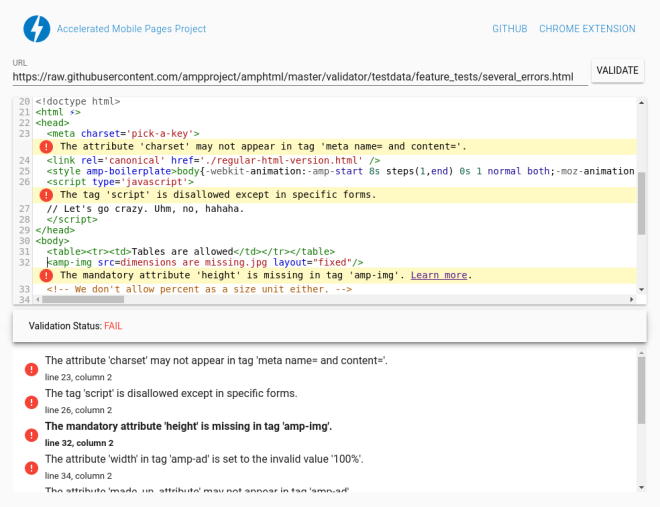
There are multiple ways to validate your AMP pages. First is the use of simple AMP validator provided by AMP project. Here, you just need to enter the URL to validate. It will display the status whether it has passed or failed.
This process can be time taking, especially if the website is very large. It will require copying and pasting each AMP URL into the validator separately.
SEMrush’s Site Audit
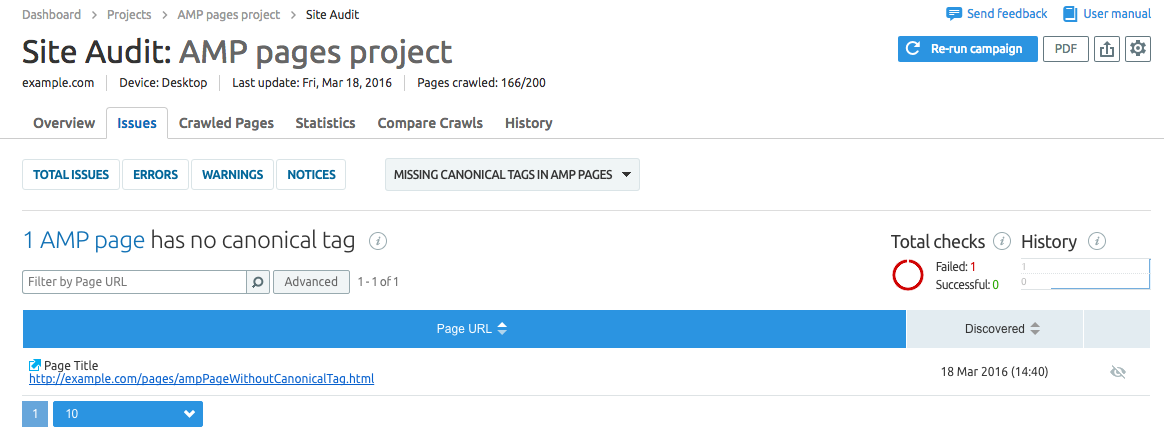
Site Audit now supports the AMP. Developers can choose to crawl their own AMP first. It is the right method to validate the entire AMP at once. This will save a lot of time. AMP audit features 40 different checks which are grouped as AMP HTML issues, style and layout issues, template issues etc.
Testing AMP in Google Search Console
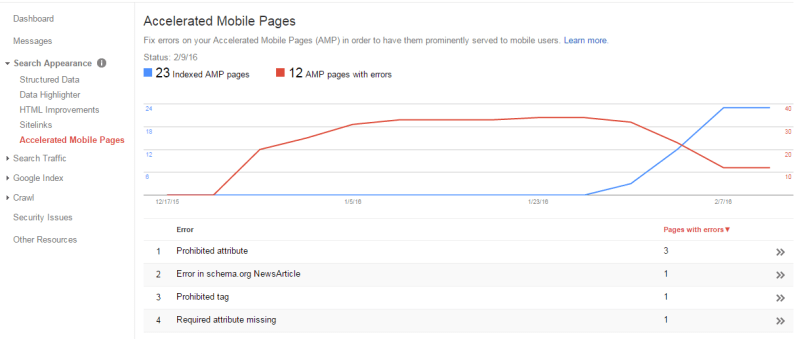
By analyzing AMP in Google search, visitors will get notified of any issues that they have when crawling your web pages. The only problem is that you will have to wait until Google crawls the website.
Go to “Search appearance” and then “Accelerated Mobile Pages”. This way, you will be logged in to Google search console to view all the AMP’s errors that Google bot has discovered.
Once the AMP is validated and if you decide to clone your website, you can move ahead to the live version.
Final Verdict!
Google AMP for WordPress is an ultimate way to increase website speed for mobile visitors. This framework ain’t for every website. However, businesses definitely need to check how it affects the business revenue.
Though your revenue might not take a hit in general. But, AMP will definitely make your visitors happy. And, it will get you the right AMP designation in Google’s mobile searches.
Found this post interesting or looking forward to integrating Google AMP in your WordPress website? Get in touch with us or leave a query below. Our WordPress developers will definitely find the right solution to help you out.
Posted By: HireWebDeveloper Team– Contact Us to Hire WordPress Developer.